
Daisy Chain quilt tutorial
Cutting
Cut 4.75" strips across the width of your chosen solid and print fabrics. You can use as many print fabrics as you like. I think I used about 20 different prints. You will need at least 98" (2.75 yards or 2.5m) solid fabric.

Construction
Sew half of your fabric strips together as shown below. Crosscut these strip sets at a 45 degree angle into 6.5" units (as shown). If you piece and cut carefully, you should be able to cut four units from each strip set.

Sew the other half of your fabric strips together and crosscut as shown below.

You will need 80 units. Lay your blocks out in ten columns of eight units each until you are happy with the placement. Join the units to form vertical columns.
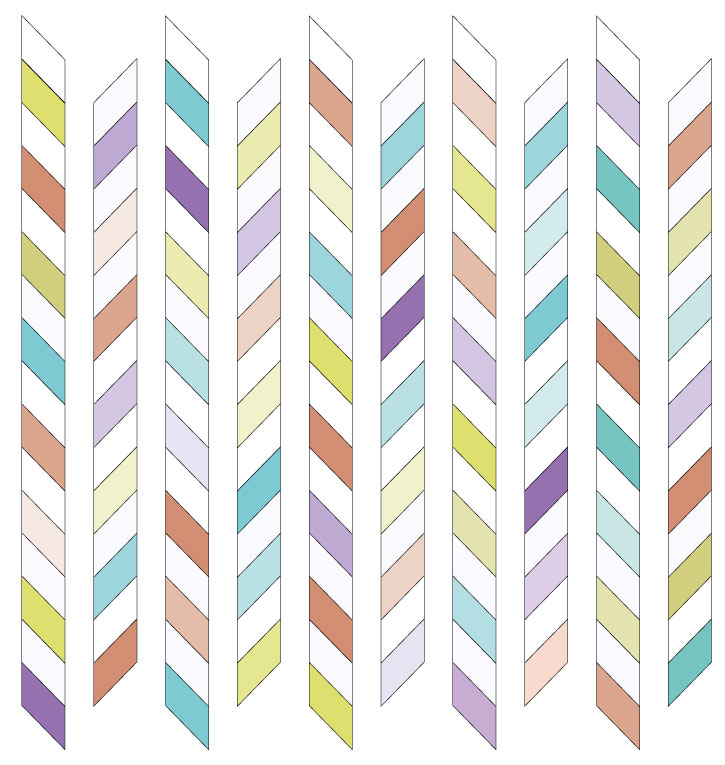
Unpick the top solid fabric parallelogram from each of the odd-numbered columns, flip the parallelogram over and sew to the bottom of each of the even-numbered columns.

Join the ten columns together. Square up the top and bottom edges of the quilt by trimming the excess as shown.

These measurements will yield a quilt 60" wide by 84" long.